Archive for category Linux
Corrupted pool because of a smaller disk
A few days ago, I replaced one of the four hard drives of my server using the now abandoned operating system OpenSolaris (cf. Replace disk on OpenSolaris).
But after a forced reboot (due to a power failure), the raid pool called ‘dpool’ was corrupted:
smoreau@GGW-Server:~# zpool import
  pool: dpool
    id: 4586630987298426393
 state: UNAVAIL
action: The pool cannot be imported due to damaged devices or data.
config:

        dpool         UNAVAIL  insufficient replicas
          raidz1      UNAVAIL  corrupted data
            c3t1d0s4  ONLINE
            c3t2d0s4  ONLINE
            c3t3d0s4  ONLINE
            c3t4d0s4  ONLINE
After some research on the internet, I found the following link:
http://permalink.gmane.org/gmane.os.solaris.opensolaris.zfs/30260
This discussion is talking about a similar problem linked to a replaced disk which was a bit smaller than the other ones.
As I replaced the faulty drive by a new drive from a different manufacturer, it is more than likely that I was experiencing the same issue. And I was right! 😉
This is the actions I took to fix the issue:
-
Remove the device previously added (
c3t3d0s0) from the mirror pool called ‘rpool’:smoreau@GGW-Server:~# zpool status pool: rpool state: ONLINE scrub: none requested config: NAME STATE READ WRITE CKSUM rpool ONLINE 0 0 0 mirror ONLINE 0 0 0 c3t1d0s0 ONLINE 0 0 0 c3t2d0s0 ONLINE 0 0 0 spares c3t4d0s0 AVAIL c3t3d0s0 AVAIL errors: No known data errors smoreau@GGW-Server:~# zpool remove rpool c3t3d0s0 smoreau@GGW-Server:~# zpool status pool: rpool state: ONLINE scrub: none requested config: NAME STATE READ WRITE CKSUM rpool ONLINE 0 0 0 mirror ONLINE 0 0 0 c3t1d0s0 ONLINE 0 0 0 c3t2d0s0 ONLINE 0 0 0 spares c3t4d0s0 AVAIL errors: No known data errors -
Unconfigure the faulty disk (cf. SATA Hot-Plugging With the cfgadm Command):
smoreau@GGW-Server:~# cfgadm -c unconfigure sata4/3
Unconfigure the device at: /devices/pci@0,0/pci108e,5351@1f,2:3
This operation will suspend activity on the SATA device
Continue (yes/no)? yes
-
Take down the raid pool ‘dpool’ using the command
zpool export dpool -
Repartition the disk to have the exact same number of cylinders using
format -e c3t3d0s4.partition> p Current partition table (original): Total disk cylinders available: 30397 + 2 (reserved cylinders) Part Tag Flag Cylinders Size Blocks 0 root wm 1 - 4288 32.85GB (4288/0/0) 68886720 1 unassigned wm 0 0 (0/0/0) 0 2 backup wu 0 - 30396 232.85GB (30397/0/0) 488327805 3 unassigned wm 0 0 (0/0/0) 0 4 unassigned wm 4289 - 30395 199.99GB (26107/0/0) 419408955 5 unassigned wm 0 0 (0/0/0) 0 6 unassigned wm 0 0 (0/0/0) 0 7 unassigned wm 0 0 (0/0/0) 0 8 boot wu 0 - 0 7.84MB (1/0/0) 16065 9 unassigned wm 0 0 (0/0/0) 0
-
Reimport the raid pool ‘dpool’ using the command
zpool import dpool.
That’s it! 🙂 From that point, I tried to reboot the server multiple time and the pool is still working fine.
Moreover, if you are in a hurry to put back the websites and everything else running on this machine, it is possible to get the pool running in degraded mode using the command zpool import dpool from the step 3:
smoreau@GGW-Server:~# zpool import dpool
smoreau@GGW-Server:~# zpool status
  pool: dpool
 state: DEGRADED
status: One or more devices could not be opened.  Sufficient replicas exist for
        the pool to continue functioning in a degraded state.
action: Attach the missing device and online it using 'zpool online'.
   see: http://www.sun.com/msg/ZFS-8000-2Q
 scrub: none requested
config:

        NAME                     STATE     READ WRITE CKSUM
        dpool                    DEGRADED     0     0     0
          raidz1                 DEGRADED     0     0     0
            c3t1d0s4             ONLINE       0     0     0
            c3t2d0s4             ONLINE       0     0     0
            6884975300114722316  UNAVAIL      0   739     0  was /dev/dsk/c3t3d0s4
            c3t4d0s4             ONLINE       0     0     0

errors: No known data errors

  pool: rpool
 state: ONLINE
 scrub: none requested
config:

        NAME          STATE     READ WRITE CKSUM
        rpool         ONLINE       0     0     0
          mirror      ONLINE       0     0     0
            c3t1d0s0  ONLINE       0     0     0
            c3t2d0s0  ONLINE       0     0     0
        spares
          c3t4d0s0    AVAIL

errors: No known data errors
Replace disk on OpenSolaris
|
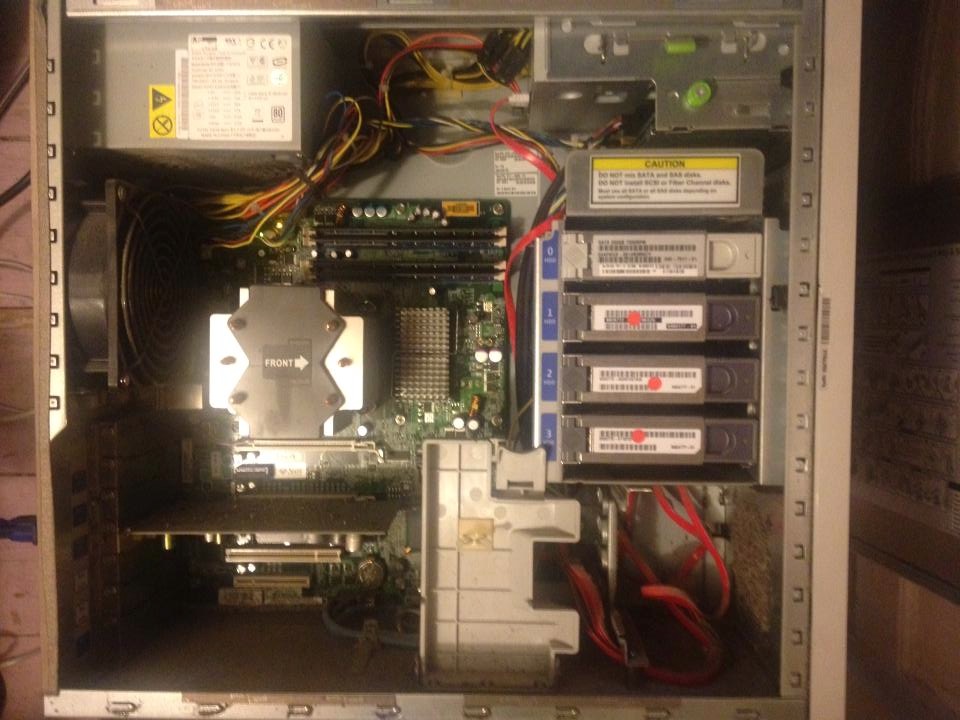
I’ve bought six years ago, in April 2008, a Sun Ultra 20 M2 Workstation, Dual-Core 2.6 GHz AMD Opteron Processor – Model 1218.
The server contains four hard drives of 250Go and I installed the now abandoned operating system OpenSolaris. Anyway, after so many years of good and loyal service, one of the four hard drives died and I had to replace it. 🙁 |
|
First of all, let’s have a look on how I configured the pools:
smoreau@Sun-Server:~# zpool status
  pool: dpool
 state: DEGRADED
status: One or more devices could not be opened.  Sufficient replicas exist for
        the pool to continue functioning in a degraded state.
action: Attach the missing device and online it using 'zpool online'.
   see: http://www.sun.com/msg/ZFS-8000-2Q
 scrub: scrub completed after 0h20m with 0 errors on Sat May 18 15:45:00 2013
config:

        NAME          STATE     READ WRITE CKSUM
        dpool         DEGRADED     0     0     0
          raidz1      DEGRADED     0     0     0
            c3t1d0s4  ONLINE       0     0     0
            c3t2d0s4  ONLINE       0     0     0
            c3t3d0s4  UNAVAIL      0 11.8K     0  cannot open
            c3t4d0s4  ONLINE       0     0     0

errors: No known data errors

  pool: rpool
 state: ONLINE
 scrub: none requested
config:

        NAME          STATE     READ WRITE CKSUM
        rpool         ONLINE       0     0     0
          mirror      ONLINE       0     0     0
            c3t1d0s0  ONLINE       0     0     0
            c3t2d0s0  ONLINE       0     0     0
        spares
          c3t3d0s0    UNAVAIL   cannot open
          c3t4d0s0    AVAIL

errors: No known data errors
As you can see, I configured two pools:
- A raid pool called ‘dpool’ using the four drives
- A mirror pool called ‘rpool’ using two drives and having two spares
You can also see above that one of the disks (c3t3d0) doesn’t seem to work any longer. This is the faulty disk which needs to be replaced.
Please note that it was the first time I had to replace a disk in this server. So, you will notice that I struggled a little bit to find the right way. 😉
The first thing I did was shutting down the machine and replacing the physical disk. Once I’ve done that, I simply reboot the machine.
Let’s now check if the drive has been recognised by the system:
smoreau@Sun-Server:~# cfgadm -alv | grep c3t3d0
sata4/3::dsk/c3t3d0            connected    configured   ok         Mod: SEAGATE ST32500NSSUN250G 0814B5MKCY FRev: 3AZQ SN: 5QE5MKCY
So far so good, the drive has been successfully connected and configured. 🙂
I then try a few things to add the new drive in the pools:
smoreau@Sun-Server:~# zpool online dpool c3t3d0s4
warning: device 'c3t3d0s4' onlined, but remains in faulted state
use 'zpool replace' to replace devices that are no longer present
As suggested in the error message, I tried the following:
smoreau@Sun-Server:~# zpool replace dpool c3t3d0s4
cannot open '/dev/dsk/c3t3d0s4': I/O error
Looking at this error on the internet, I found the following explanation on the ZFS Troubleshooting Guide:
This error means that the disk slice doesn’t have any disk space allocated to it or possibly that a Solaris fdisk partition and the slice doesn’t exist on an x86 system. Use the format utility to allocate disk space to a slice. If the x86 system doesn’t have a Solaris fdisk partition, use the fdisk utility to create one.
This is pretty clear, I installed the new drive but I didn’t partition it.
Let’s do it then.
First of all, let’s check the partition table on one of the healthy drive using the command format -e c3t4d0:
partition> print
Current partition table (original):
Total disk cylinders available: 30398 + 2 (reserved cylinders)

Part      Tag    Flag     Cylinders         Size            Blocks
  0       root    wm       1 -  4289       32.86GB    (4289/0/0)   68902785
  1 unassigned    wm       0                0         (0/0/0)             0
  2     backup    wu       0 - 30397      232.86GB    (30398/0/0) 488343870
  3 unassigned    wm       0                0         (0/0/0)             0
  4 unassigned    wm    4290 - 30396      199.99GB    (26107/0/0) 419408955
  5 unassigned    wm       0                0         (0/0/0)             0
  6 unassigned    wm       0                0         (0/0/0)             0
  7 unassigned    wm       0                0         (0/0/0)             0
  8       boot    wu       0 -     0        7.84MB    (1/0/0)         16065
  9 unassigned    wm       0                0         (0/0/0)             0
Using the table below and the article Mirroring my Solaris OS partition, I manually recreated the partition table on the new drive.
Once I’ve done it, I ran the following commands:
smoreau@Sun-Server:~# zpool replace dpool c3t3d0s4
invalid vdev specification
use '-f' to override the following errors:
/dev/dsk/c3t3d0s4 overlaps with /dev/dsk/c3t3d0s2
smoreau@Sun-Server:~# zpool replace -f dpool c3t3d0s4
smoreau@Sun-Server:~# zpool status dpool
  pool: dpool
 state: DEGRADED
status: One or more devices is currently being resilvered.  The pool will
        continue to function, possibly in a degraded state.
action: Wait for the resilver to complete.
 scrub: resilver in progress for 0h0m, 0.03% done, 13h27m to go
config:

        NAME                STATE     READ WRITE CKSUM
        dpool               DEGRADED     0     0     0
          raidz1            DEGRADED     0     0     0
            c3t1d0s4        ONLINE       0     0     0  2.34M resilvered
            c3t2d0s4        ONLINE       0     0     0  2.34M resilvered
            replacing       DEGRADED     0     0     0
              c3t3d0s4/old  FAULTED      0 8.04K     0  corrupted data
              c3t3d0s4      ONLINE       0     0     0  3.50M resilvered
            c3t4d0s4        ONLINE       0     0     0  2.23M resilvered

errors: No known data errors
This seems to be working, we can see below that the system is rebuilding the data on the new drive.
After a few minutes, we can see that the pool is healthy again:
smoreau@Sun-Server:~# zpool status dpool
  pool: dpool
 state: ONLINE
 scrub: resilver completed after 0h24m with 0 errors on Sat May 18 16:50:44 2013
config:

        NAME          STATE     READ WRITE CKSUM
        dpool         ONLINE       0     0     0
          raidz1      ONLINE       0     0     0
            c3t1d0s4  ONLINE       0     0     0  43.8M resilvered
            c3t2d0s4  ONLINE       0     0     0  43.8M resilvered
            c3t3d0s4  ONLINE       0     0     0  11.8G resilvered
            c3t4d0s4  ONLINE       0     0     0  36.1M resilvered

errors: No known data errors
Samba vs NFS on DNS-323
So far, I was using Samba to share the files stored on my D-Link DNS-323. However, people tend to say that NFS is quicker than Samba. So let’s benchmark those two protocols and figure out which one is actually quicker.
First of all, here is my configuration:
| Server | Client |
|---|---|
|
D-Link DNS-323 Linux dlink-5610E5 2.6.12.6-arm1 Samba 3.0.24 UNFS3 0.9.20 |
Raspberry Pi Linux alarmpi 3.6.11-15-ARCH+ CIFS utils 6.1-1 NFS utils 1.2.8-9 |
I used IOzone to benchmark these protocols from the Raspberry Pi. You can find the package for Arch Linux ARM on one of my previous post.
I first mounted the Samba and NFS share drives in the two respective folders /mnt/storage_smb and /mnt/storage_nfs.
I then ran the following commands (not at the same time):
iozone -RazcR -U /mnt/storage_smb -f /mnt/storage_smb/testfile -b smb_excel_output.xls
iozone -RazcR -U /mnt/storage_nfs -f /mnt/storage_nfs/testfile -b nfs_excel_output.xls
You can download the output files here and here.
Or, you can simply have a look at a summary of these two files in the following table which basically compare the average speed (in Kbytes per second) for both Samba and NFS:
| Samba | NFS | |
|---|---|---|
| Write | 7683 | 6676 |
| Re-write | 7544 | 6795 |
| Read | 21862 | 50464 |
| Re-read | 22383 | 50210 |
| Random read | 6348 | 6444 |
| Random write | 7603 | 6751 |
| Backward read | 5909 | 5246 |
| Record rewrite | 80294 | 87225 |
| Stride read | 15629 | 11868 |
| Fwrite | 7471 | 6700 |
| Re-fwrite | 7494 | 6671 |
| Fread | 7739 | 7685 |
| Re-fread | 7596 | 7639 |
As you can see, it looks like NFS is quicker for read operations but slower for write operations than Samba. But please remember that this is true for this very specific configuration ; It could be completely different for another one.
In conclusion, I personally decided to use both Samba and NFS depending of what I need. If I need a read only access to my data, I use NFS. However, if I need to write data, I use Samba.
NB: Another reason why I didn’t completely stop using Samba is because symbolic links don’t work with NFS. Instead, you need to use binding (mounting a folder inside another folder), but this is kind of incompatible with my use of rsync to backup my data. 🙁
SD Card Benchmark on a Raspberry Pi
Some time ago, I bought a Raspberry Pi. I am not going to describe what it is here, but you can read more about it on this page.
The first thing you need to buy when you’ve got a Raspberry Pi is a SD card. But the question I asked myself is: “Which one?”. Indeed, there are so many models with different type, capacity and speed. 🙁
I first checked the compatibility list found on the Embedded Linux Wiki:
http://elinux.org/RPi_SD_cards#Working_.2F_Non-working_SD_cards
But this list didn’t help me much. Indeed, out of them, which one should I buy?
This is why I decided to test two SD cards with two different speed:
- SanDisk SDSDXPA-008G-X46 8GB 95MB/S Extreme Pro SDHC Class10
- SanDisk SDSDX-032G-FFP 32GB 45MB/S Extreme SDHC Class10
As you can see, the speed of the first one is 95MB/S against 45MB/S for the second one. Does it mean the Raspberry Pi will run twice quicker?
Let’s check it by benchmarking the cards.
I used IOzone to benchmark these cards. Unfortunately, IOzone is not available for ARM on ArchLinux. I wrote a separate article about it.
I ran the exact same command for both cards:
iozone -e -I -a -s 50M -r 4k -r 512k -r 16M -i 0 -i 1 -i 2
Please find below the result for the SD card with a speed of 95MB/S:
                                                    random  random    bkwd   record   stride
      KB  reclen   write rewrite    read    reread    read   write    read  rewrite     read   fwrite frewrite   fread  freread
   51200       4    1422    1502     5841     5838    5688     878
   51200     512   20743   20924    22094    22130   22121    8313
   51200   16384   20090   21349    22413    22514   22458   21351
The full output can be found here.
And the following is the result for the SD card with a speed of 45MB/S:
                                                    random  random    bkwd   record   stride
      KB  reclen   write rewrite    read    reread    read   write    read  rewrite     read   fwrite frewrite   fread  freread
   51200       4    1653    1858     4566     4716    3996     755
   51200     512   20515   19534    21953    22031   21867    4722
   51200   16384   15841   21240    22311    22390   22384   21177
The full output can be found here.
So, it looks like the difference is not that big. Indeed, the SD card with a speed of 95MB/S is not twice quicker than the other one. Why is that? In my opinion, this is directly linked to the actual speed of the SD card reader within the Raspberry Pi.
Which means that it doesn’t matter which card you are using, you won’t go further than 22MB/S anyway.
Finally, please find below some other benchmarks on the same topic:
IOzone for Arch Linux ARM
For different benchmarks I will later publish on this blog, I wanted to use IOzone. Unfortunately, this package is not available on Arch Linux ARM via the pacman package manager.
This tool is not difficult to compile, but still I decided to create an Arch Linux ARM package for it and share it with you: iozone-3_414-1-armv6h.pkg.tar.xz
You can install it using the following command:
pacman -U iozone-3_414-1-armv6h.pkg.tar.xz
Please note that I also tried to submit the package to the AUR (Arch User Repository). To my surprise, it was already present (https://aur.archlinux.org/packages/iozone/) but not available for ARM. 🙁
-
You are currently browsing the archives for the Linux category.
WWF – Help us